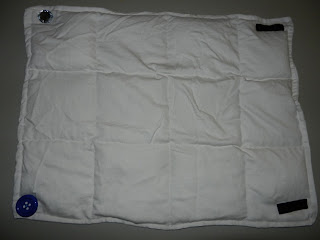
Here are instructions on how to make a quick and easy lap pad by using a pillowcase.
SUPPLIES
• Thread
• Two 2lb (32oz) bags of Polly Pellets – These can be found at Joann’s, Michaels or Walmart. Less expensive at Walmart.
• Pillowcase
• Funnel (Empty water bottle works!)
• 1/2 measuring cup
• Thread
• Sewing machine
• Scissors
• Ruler
• Tailors chalk or fabric pencil.
• Thread
• Two 2lb (32oz) bags of Polly Pellets – These can be found at Joann’s, Michaels or Walmart. Less expensive at Walmart.
• Pillowcase
• Funnel (Empty water bottle works!)
• 1/2 measuring cup
• Thread
• Sewing machine
• Scissors
• Ruler
• Tailors chalk or fabric pencil.
DIRECTIONS
1. Shorten pillow so it measures 21” long.
2. Now sew a top stitch around the three sides. (Approximately 1/4” around edge)
1. Shorten pillow so it measures 21” long.
2. Now sew a top stitch around the three sides. (Approximately 1/4” around edge)
3. Using the tailors chalk(or pencil), draw vertical and horizontal lines with the columns being approximately 5 inches apart.
4. Sew the material along the vertical lines only.
5. Fill pocket by pocket on bottom row only of the horizontal row using a funnel. Fill each pocket with 1/2 cup of polly pellets. Do not overfill the squares as it will make it more difficult to sew the polly pellets in.
6. Sew along the horizontal chalk line. Ensure that the pellets are below the line and away from the needle.
7. Repeat steps 5 and 6 until you reach the last row.
8. At the last row, sew the end under.
You’re done! Add some big buttons, Velcro or other fidgets to help keep their fingers busy. (optional)


